PREVIOUS SALES DETAILS IN TALLY ERP 9
₹5,999.00 Original price was: ₹5,999.00.₹1,180.00Current price is: ₹1,180.00. Inclusive of taxes
Benefit of this TDL
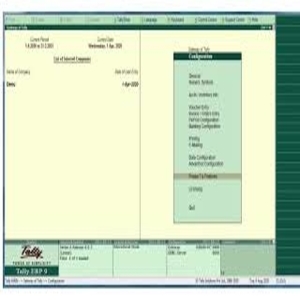
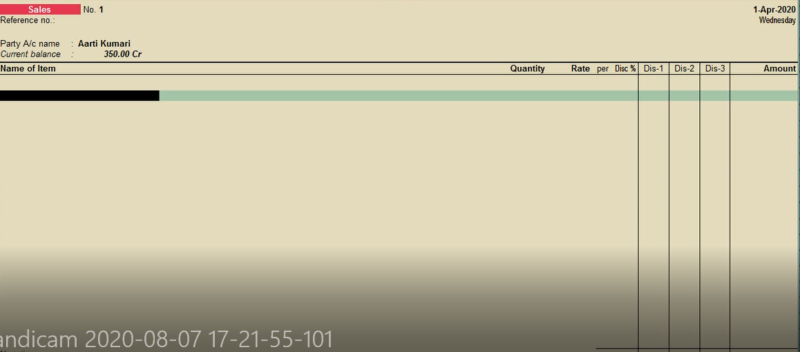
With the Help of this TDL you can see the previous sales of of item while doing sale entry.
Call our Tally & Busy Support Centre at 9911721597
or email us at support@dssoftweb.com
Tally|Certified partner|Distributer|Best|Delhi|Support|Authorised
PREVIOUS SALES DETAILS IN TALLY ERP 9https://onlineretailhub.in/
● Go to Gateway of Tally > Display > Account books > Sales Register. The Sales Register screen is displayed as shown below:
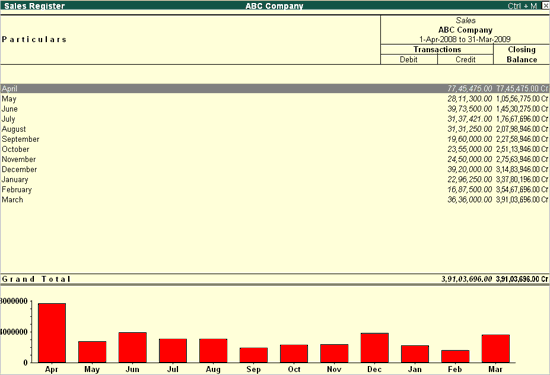
By default, all registers display Monthly Summary with transactions and closing balances.
Drill down into each month to view the sales voucher register for that month and to go to the accounting voucher alteration (secondary) screen.
Select a month and press Enter to see the List of All Sales Voucher Register , as shown below:
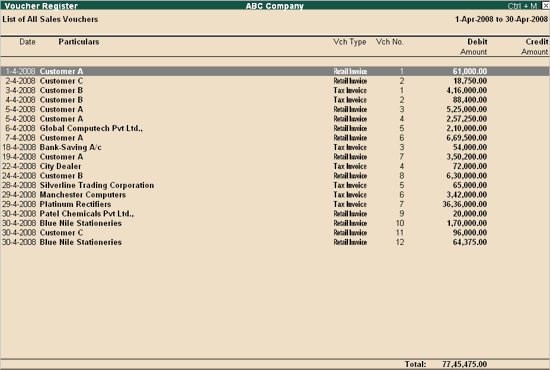
A list of all sales vouchers pertaining to the month you selected is displayed. The options in the button bar can be used to change the display according to your preferences. You can change the period of the report as well as the depth of information.http://dssoftweb.com/
Use F12: Configure to see the report with some or all of the following information, namely Narrations, Bill-wise details, Cost Centre details and Inventory details.
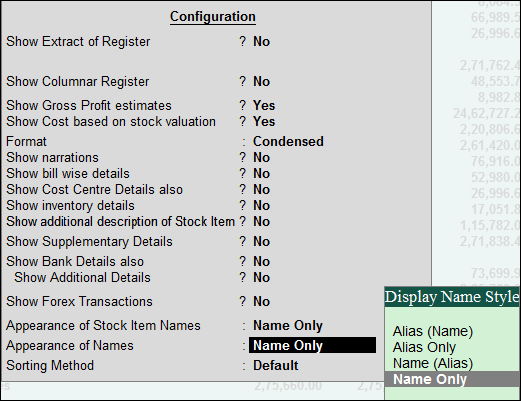
Click F1 : Detailed to view the reports in detailed format from within the Sales Voucher Register screen.
PREVIOUS SALES DETAILS IN TALLY ERP 9
Export Sales/Purchase Register in Excel to generate Pivot Table
The Sales/Purchase register can be exported in excel to be compatible to generate pivot table. This is so that the user may generate reports of various combinations based on specific requirements. This will eliminate the need for customisation of the existing reports to prepare sales/purchases data in the required format.
To export the Sales Register for Pivot Table from the Sales Voucher Register screen
1. Click E : Export or press Alt+E , to open the Exporting Sales Register screen.
2. Select the required language from the list of languages displayed.
3. Select Excel (Spreadsheet) under Format from the list of formats displayed.
4. By default, the exported file will be stored in C:\Program Files\Tally.ERP9 for Windows 7 and C:\Tally.ERP9 for Windows XP operating systems.
5. Press Enter to accept the default Output File Name or type the filename of your choice in order to save the file with a different name.
6. Press Enter to accept the default Output Sheet Name .
7. To update the existing file select Yes in Update Existing File .
8. Set Yes to the option Export for Pivot Table.
Note: This option appears only when the Sales / Purchase Voucher Register / Extract is exported, and when the Company is maintaining Accounts with Inventory.
9. To update the existing file select Yes in Update Existing File .
10. To format the contents of the file select Yes in Excel (Spreadsheet) formatting.
11. Select Yes for the field with Colour , to retain the background colour in the exported file.
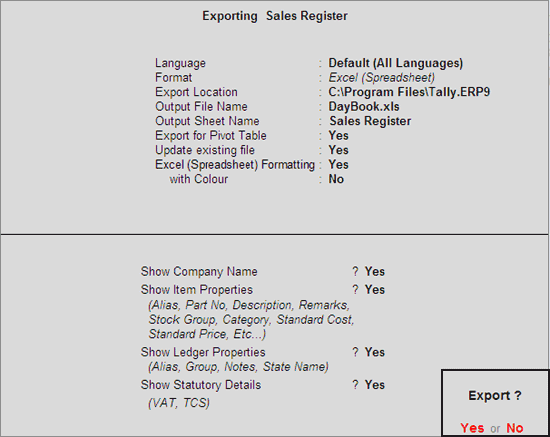
12. Accept to export the Sales Register Vouchers to an excel file for pivot table.
13. Open the exported file from the specified folder.
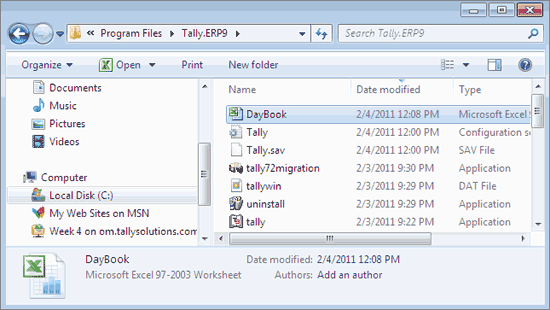
14. The excel sheet opens as shown below:
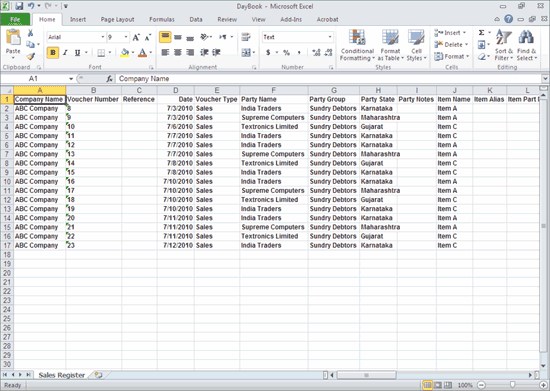
15. Create a Pivot table and set the Report filter, Row labels, Column labels and Values based on your requirement to generate a customised report.
Note: The steps to Create Pivot table varies between the different versions of Microsoft Excel. Refer to the help file of respective MS Excel versions for the procedure.
The report generated from Pivot table Item-wise Godown-wise Batch-wise Party-wise is displayed as shown:

Only logged in customers who have purchased this product may leave a review.
Related products
Business Productivity
Cloud Service
Softwares
Business Productivity
Marg ERP 9 Softwares
Business Productivity
















Reviews
There are no reviews yet.